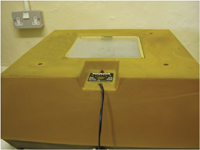
Artificial Hatching This is the use of an incubator to hatch eggs. Small incubators are in regular use with many poultry keepers, the advantage being that incubation conditions are instantly available at the flick of a switch. It saves the extra space of pens for broodies and takes very little electricity to run. Technical improvements have greatly increased efficiency, but best results will be obtained with eggs which are between 24 hours and seven days old and which have been stored in a cool (10˚C, 50˚F) place and turned daily. Mark the eggs in pencil with the date and breed and keep records. Any dirt on the eggs can be scraped off with a dry potscraper, the ideal being to have clean eggs in the first place. Virkon disinfectant can be used with safety to clean out incubators after a hatch. This is most important for the success of future hatches as the bacteria and debris produced by a hatch is phenomenal. Follow the manufacturer’s instructions for an incubator and run it for a few days, checking the temperature with another thermometer. Do not add any water – it seems to be a common misconception that in this damp country water needs adding during the incubation process. Try and site the incubator in a place which does not vary much in average temperature such as a spare bedroom, but avoid direct sunlight. During the incubation process the eggs must be turned in order for the embryo to develop normally (the broody does this by instinct). If turning by (clean) hand do so at least twice a day and turn the eggs end-over-end so that the chalazae (strings which hold the yolk stable) do not wind up, potentially damaging the embryo, or mark the eggs and turn them from one side then back to the other, not continuously in the same direction. If the incubator is an automatic turning one, turn off the mechanism 2 days before the hatch date, or stop turning them by hand at that time. The best system is to have a separate hatcher so that eggs can be set weekly and not actually hatch in the incubator, therefore keeping it cleaner. A small incubator that is non-turning can be used as a hatcher as long as the correct temperature can be maintained. Eggs should be moved to the hatcher 2 days before they are due to hatch. A little hot water can be added in the base of the hatcher when the eggs start to pip (the diamond-shaped start of the shell breaking) to keep the shell membrane moist. The chick pecks its way out of the broad end of the egg by means of the egg tooth which is on the end of its top beak. The egg tooth falls off soon after hatching.
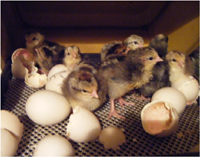
Chicks may take two days to hatch or they may all hatch at once. The latter is better, but not always possible. Most small incubators have a window in so that you do not have to take off the top to see inside. If you do not have a separate hatcher, it is better to fill (or part fill) an incubator, hatch the eggs, clean it out and start again. This avoids the build-up of harmful bacteria which can adversely affect the hatch, plus keeping the humidity correct for hatching.
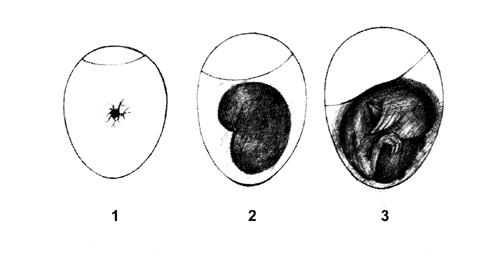
In order to make best use of incubator space (and broody hens for that matter) the eggs can be candled after 7 days’ incubation. This involves holding a bright torch to the broad end of each egg in a darkened room. Obviously white-shelled eggs will be easier to see into than dark brown eggs. If the egg is infertile you will be able to see just the shadow of the yolk. Rotate the egg slightly to make this move within it. If fertile, a spider-shape of blood vessels will be seen with the heart beating in the middle. If there is a ring of blood vessels with none in the centre, the germ has died for some reason. The infertile eggs can be removed and fresh ones added if you are going to use a separate hatcher. If you are not sure, wait until the next candling session in a week when fertile eggs will be dark near the pointed end and the airspace will be much larger with a sharp dividing line between the two. If the division is fuzzy, or if there is only a small dark area, the embryo is likely to have died. The air sac gradually gets larger as hatching date approaches and sometimes the chick can be seen bobbing away from the candling light.
Take the chicks out when they are dry and, keeping them warm and dark, transfer them to their rearing quarters and dip their beaks in tepid water.
|


